30 July 2007
25 July 2007
How to Can Green Beans
8 weeks to the day after I plant green bean seeds, I am usually able to go out and harvest beans for the first time. Every few days in the summer I end up canning beans. Want to know how? Read on. Make sure you follow the direction for your own pressure canner, though, and for your own altitude.
First, you'll need one of these. For low-acid foods like vegetables and meats, you have to use one. It gets hotter than boiling so the food is preserved properly.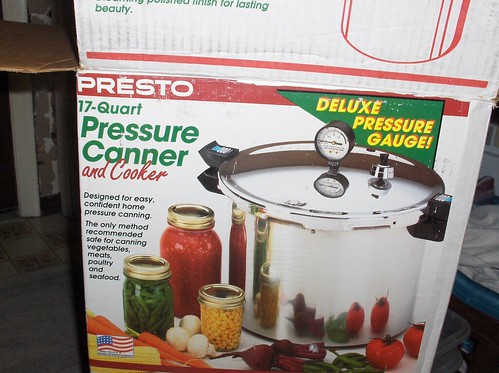
You'll want to read through the directions that come with your canner to familiarize yourself with them, but they are all similar.
Then, I get some clean jars in the clean sink and let them sit in hot water until I'm ready to fill them. If the jars are hot, they are less likely to break when you add hot liquid. I didn't use to do this until one summer half of the beans I did didn't seal. I don't worry about it for fruits, though.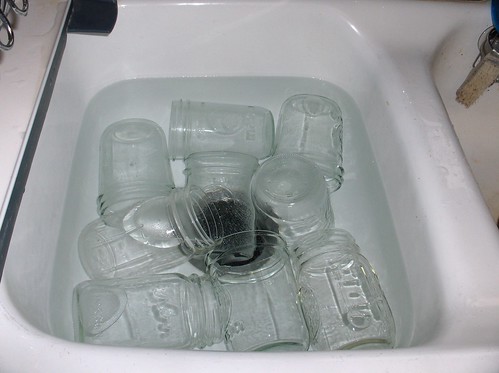
Then you'll want to put some water in your canner and start heating it up. Mine wants about 3 quarts.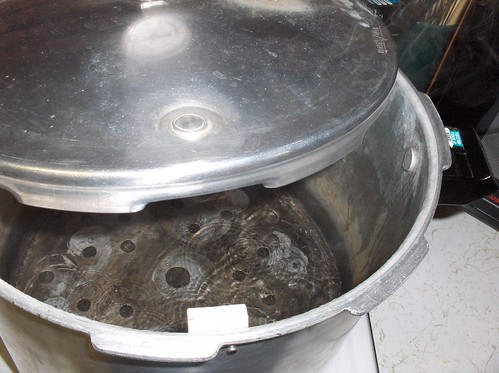
You'll also need some vinegar and some salt. The vinegar helps white mineral deposits from parking themselves on your jars when you pull them out of the canner (especially if you have hard water like me) and the salt is for the beans. You'll want canning/pickling salt because it doesn't have the anti-caking agents that table salt has that can make the liquid in your jars cloudy.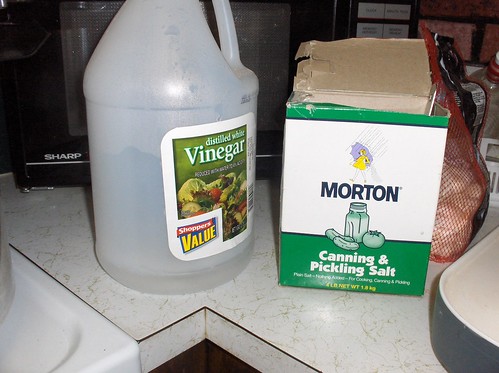
Before you start all this other stuff, you'll want to prepare the beans. Wash them, snap off both ends, and break them into the lengths you want. Smaller pieces fit better into the jars but take longer to prepare. Mine are about 2 inch pieces.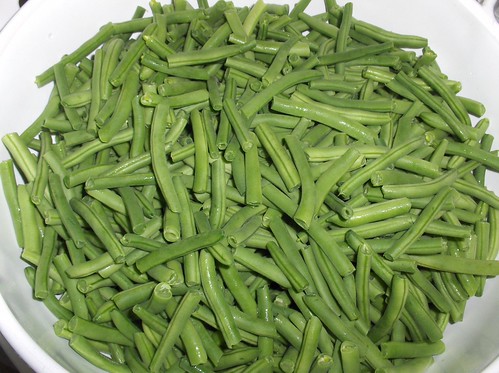
You also want to get a big pot of water on to boil. This is for filling the jars with after we put in the beans. This method of canning is called raw pack. The beans are raw when we put them in the jars. Hot pack would be if we cooked the beans in water and then packed them in the jars.
The next pot you need to get on the stove is a small pan with a little water in it and the flat lids. Follow the directions on the package, but typically you bring the water to a simmer and let the lids sit until you're ready for them.
Canning really heats up the kitchen. Look at all these pots!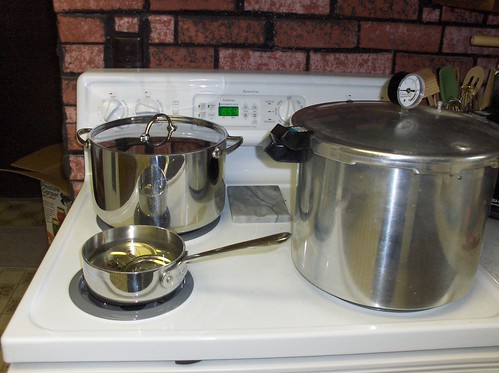
Next you want to start putting the beans into the empty jars. Shake them down a little as you go to fill in any big pockets. But then leave an inch of room at the top. This is called headspace and will help the jar seal.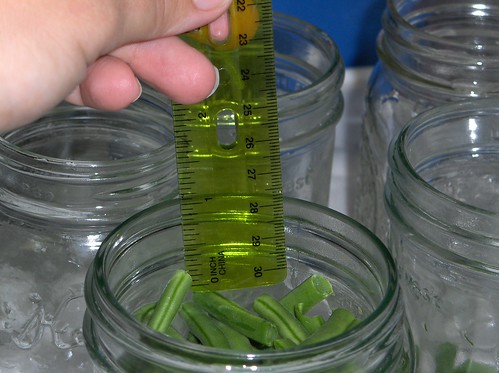
After you have all the jars filled, put some salt in each jar. I use 1/2 teaspoon per pint. You can use less or more or none. That is one of the nice things about preserving your own food.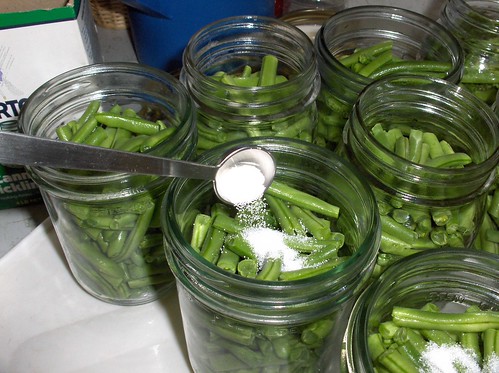
I put the salt in after the beans so I know which jars have salt in them. Also, if you preload the jars with salt and you've under- or over-estimated how many jars you'll need, that's another thing to remember.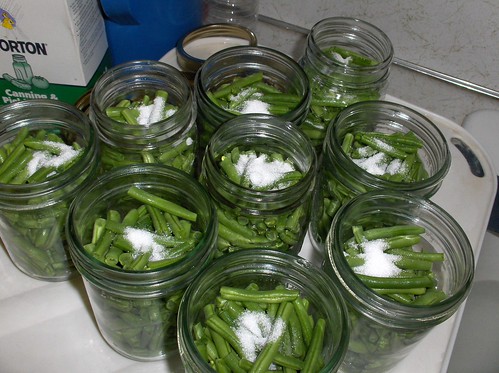
Now add boiling water to each jar, leaving about an inch of headspace (it's not critical to be exact at this point). You can use a wide-necked funnel but when it's just water, I don't mind spilling. For sticky stuff I definitely use the funnel.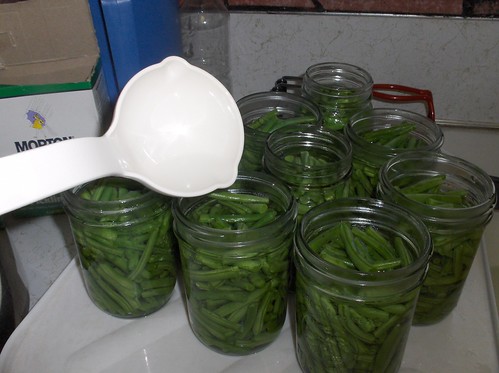
Next you'll take a thin plastic utensil--either a knife or the handle of a spatula (there is a special tool made for this, too, I think) and run it around the edges of the jar to release any air bubbles that may still be trapped. Plastic won't accidentally break a jar like metal could.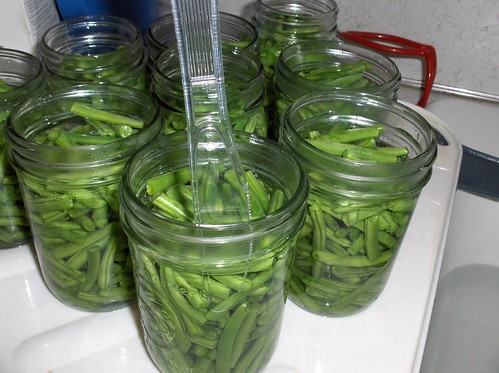
Now measure your headspace again. It needs to be an inch. If you need more, use a spoon to borrow water from the next jar over that looks like it has too much. Or ladle more from the big pot of water. If you have too much, spoon it out.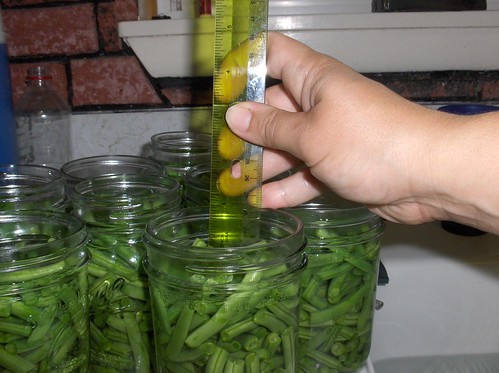
Almost done! Now get a clean rag or washcloth and get it wet and wipe the rims of the jars. This makes sure that nothing gets in the way of the seal.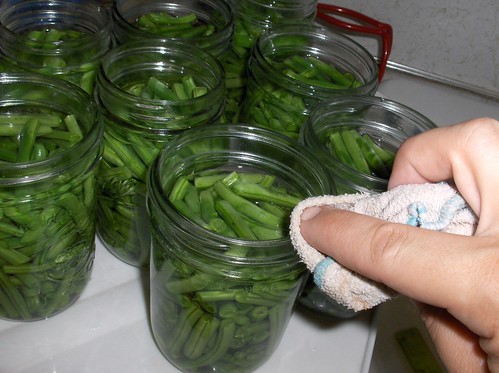
Now it's time for lids. If you don't have one of these nifty magnetic wands, use some tongs or something because you will burn your fingers.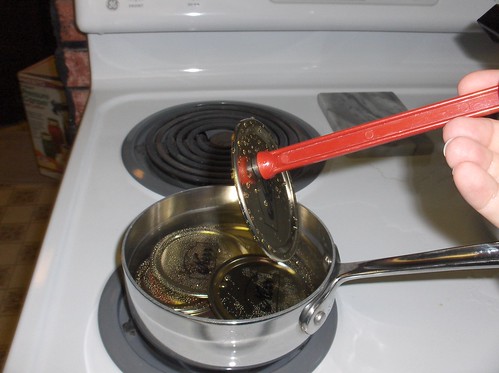
Center the lid on the jar.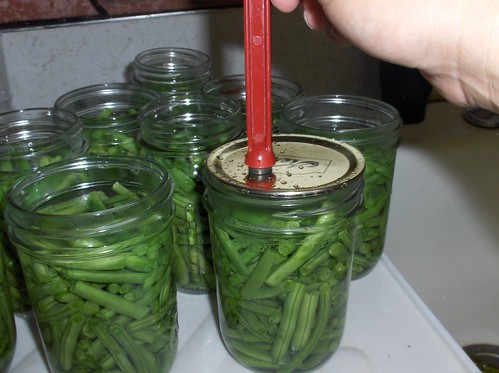
Don't forget that you need to work quickly but don't rush and forget something. Screw the ring on over the lid. When you start to meet some resistance, give it a little more twist. Don't screw them on tight or the air can't escape and let the jar seal.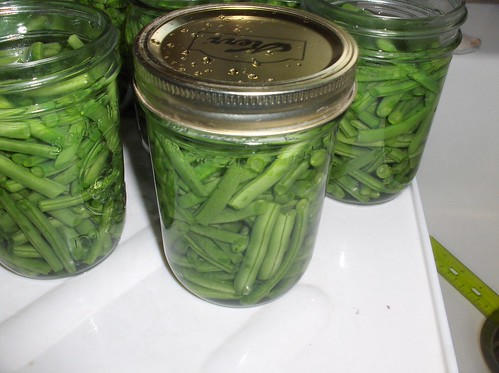
Now put the jars into the canner that has the boiling water in it. These jar tongs are very helpful.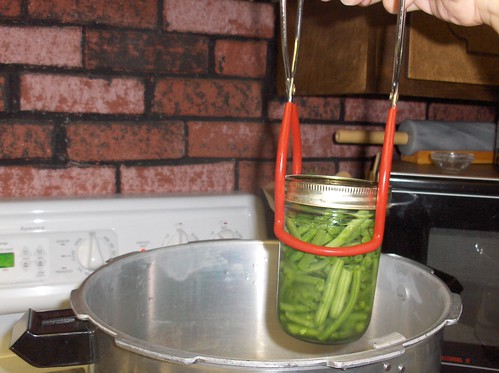
All the jars in the canner. In a pressure canner, it's all right if the jars touch each other. You can even stack small jars on top of each other. I had to cram these in to get them to fit.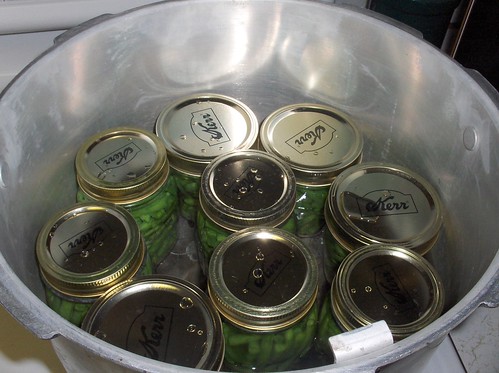
Now I put the lid on and twist it so it locks. Your canner may be different but it will be similar.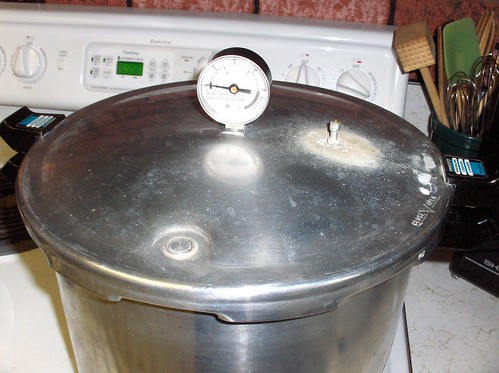
When the steam starts coming out of the vent in a steady stream, set the timer for 7-10 minutes. This exhausts all the air out of the canner.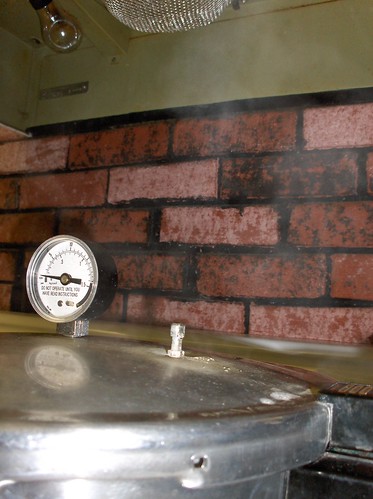
When the time is up, you put the pressure regulator on. This will allow the pressure to build up inside. The little button on the lid of this canner pops up to let you know there's pressure in there.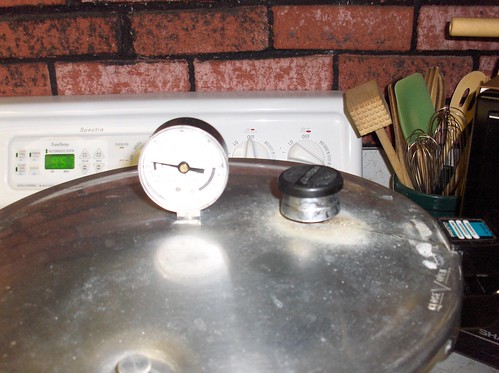
The dial will start turning. When it gets to 12 pounds, I start the timer. Most instructions in canning books are for 10 pounds. Then you add pounds to adjust for altitude. Here in the Boise area we can at 12 pounds. Set the time for 20 minutes. If the dial should happen to go below 12, stop timing and restart again when it gets back to 12. I always reduce the heat because the dial keeps going up. I haven't perfected it yet to keep it at 12, but too much pressure is fine.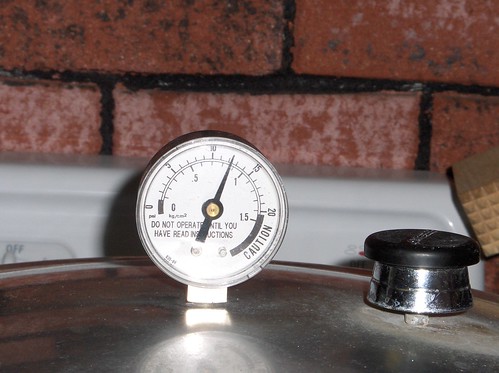
When the timer rings, remove the canner carefully from the heat. Now let it sit until the dial reaches 0 and the little button drops, indicating there's no pressure left in the canner. Don't try to let any pressure out by tipping the regulator or cool it quickly by putting it in water. You'll just break the jars and probably burn yourself.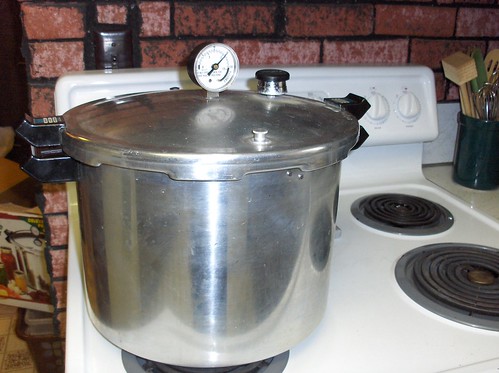
When the pressure is gone and the button drops, remove the regulator and carefully open the canner away from you.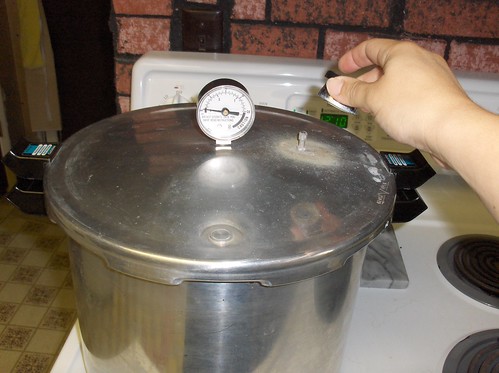
Lift the jars out one at a time, trying to keep them level.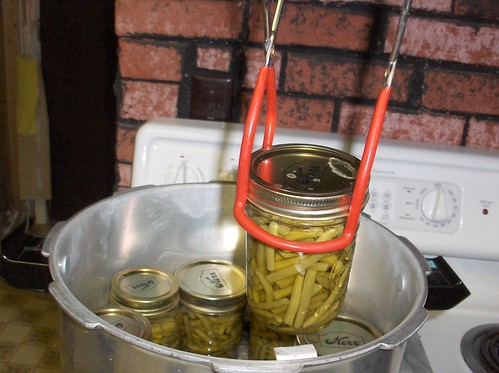
Put the jars on clean towels at least an inch apart so they can cool. Leave them until they are completely cool.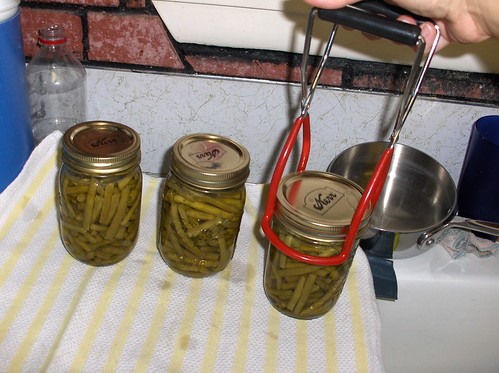
Now let them cool for up to 24 hours. Usually I wait 10 or 12. They'll be room temperature.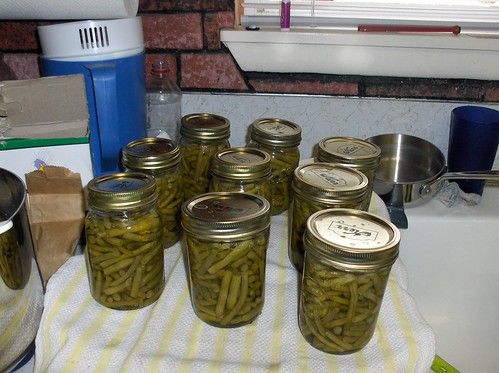
When they're all cool, wipe the jars off if they're dirty (not usually with beans, but peaches will practically require a bath) and write the date on the lids. If you did more than one batch in a day, label the batches with numbers or letters so you know which is which. Also check to make sure that the center of each lid is down (it doesn't pop up and down when you press it) to check the seal of each jar. I have found that the longer it takes me to get the jars out of the canner, the better they seal. I had to run a quick errand while these beans were depressurizing so I didn't take them out right away. They had all sealed before I even opened the canner. But if you rush to get the lid off, then get them out quickly, they are more likely to not seal. So go check your email before you take the jars out of the canner. Also, before you store the jars, remove the rings.
If you have some jars that didn't seal, you can either re-process them with new lids and rings or you can put them in the fridge and eat them in the next couple days.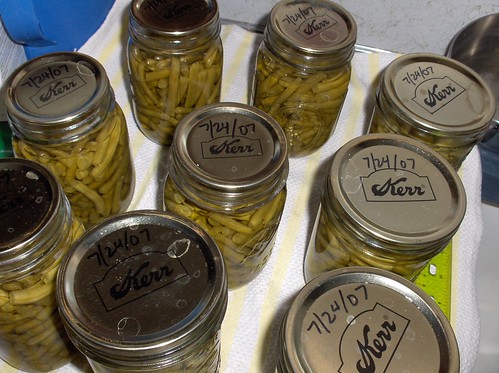
When you're ready to eat them, as an extra precaution, it is recommended to boil the beans for at least 10 minutes since they are low-acid. I add a pat of butter and serve them to my hungry kiddos!
24 July 2007
Another Birthday!
Back on July 9 the first Frugalgirl turned 7! She had a butterfly cake. 
I promised her that the next thing I sewed would be a tutu just like her sister's, but I haven't had time yet to sew anything.
I've uploaded tons of demolition photos to flickr and I'm stealing a minute here and there to update the renovation blog. Soon, I promise!
17 July 2007
With a capital C
Life around here is about to get c.r.a.z.y.
With a capital C.
In the morning, my excavator guy is coming to dig a new drainfield for our septic system.
When he's done, he's going to use his backhoe to pull down our existing family room, and dig a basement.
The next day, a concrete guy is coming to pour the footings and foundation for said basement.
Then, Frugaldad and I will work during every free minute to build and enclose the addition before the winter.
I created a new blog for updates. Check it out!
15 July 2007
Snack update
After a week of my new snack program, here's my opinions.
Three yellow snack tickets per day is way too many. Some of the kids used them up exactly but some had some leftover. I did notice that they were much more aware of their snacking habits and it was easier to limit portion size (i.e., 2 graham crackers per ticket), they had enough yellow tickets that they never ate green snacks. After a trip to the grocery store on Thursday, there was a lot of fresh fruit so Frugalgirl1 often chose an apricot instead of something else, but for the most part, they didn't change their eating habits.
The number of red tickets that I handed out was perfect. I gave them each three for the whole week. We usually have what we call "candy bar Friday," where they get to have a candy bar in their lunch box or for an afternoon snack. I told them they had to pay for their candy bars, so they had to keep one red ticket in reserve for the whole week.
Tomorrow when I dole out the tickets, I am reducing the number of yellows by half. They'll each get 10 tickets to last until next Monday. They'll still get 3 red tickets. The hardest part for me will be keeping the green snacks appealing by having ripe fresh fruit, but in the summer that is a lot easier to do.
13 July 2007
Making something from nothing
These days I feel like I spend so much time washing dishes and wiping counters, and weeding and moving hoses, which allows for a lot of introspection but not a lot of time for blogging. After I made dinner a couple times this week, I realized that I had been creating something out of nothing. Saturday afternoon I hit the grocery store to look for some dinner inspiration and boneless pork chops were on sale for "buy one, get one free." This made the per-pound price only $2 which is a bargain for any type of boneless meat these days. I picked up two packages, put one in the freezer, and left the other in the fridge for Sunday's dinner (what did I get for Saturday's dinner, you ask? BOGO tilapia fillets which I fried up in a pan. Came to $3/pound which might be the cheapest tilapia I've ever seen) Sunday night I sauteed the pork chops and made a creamy gravy with the drippings. There were two chops left over, plus some sauce, so I thinly sliced them, put them in a container with the gravy and put them in the fridge for a future dinner.
The designated leftover night arrived, and I cooked the remainder of a package of fettucini that I found in the pantry (I weighed it and it was a little more than 5 oz). Then I mixed the sliced pork and gravy with a can of cream of celery soup, about 1/2 cup sour cream, 1/2 cup grated cheddar cheese, and the cooked noodles. I put it all in a greased 10x8 baking dish, sprinkled more cheese on top, and baked it until it started to bubble on the edges, maybe 20 minutes. It turned out really yummy!
Then the next night, I happened to have leftover cooked shredded chicken in the fridge, as well as a bag of mixed greens from the garden. They had been in there for 10 (!) days but had been washed and spun dry, so they were still crisp and fresh. I also cut up some tomato, cucumber, and onion, and had some pita bread so we ate chicken salad pitas for dinner. They were delicious. And there was enough left that I got one for lunch the next day.
Both of these dinners were created with leftovers that were used in a completely different way than they had been served the first time. I certainly don't expect you to ever be able to reproduce them (I'll never even be able to reproduce the pork casserole because I didn't measure anything when I made the gravy or the casserole) but this is the sort of living that reduces waste and encourages creativity with what you have. And I think that is the definition of being frugal.
09 July 2007
Snack Attack!
About a month ago I had this fantabulous idea about how to encourage my kids to eat more healthy snacks. One day I had given the kids a granola bar for their morning snack, and Frugalgirl1 (who is turning 7 today! Happy Birthday!) had the gall to ask me "How many granola bars can we have?"
I had always limited things like that to one per day anyway, but I had a brainstorm that I finally put into practice today. I'll report back on the progress.
I've divided up snack foods into 3 categories--green, yellow, and red. Green snacks are unlimited. At snack time, they can choose any green snack. Green snacks are fruits and veggies. Now, some people may disagree with my choice, but I have also included cheese and bread in the green snack category. The bread can't be covered in jam or honey; it has to be plain or with butter.
Yellow snacks have to be purchased with a yellow snack ticket. I have alloted the kids 3 yellow snack tickets per day. I handed out a week's worth. I am encouraging them to limit their yellow snacks to 3 per day so they will still have yellow tickets at the end of the week. Yellow snacks include almost everything. Granola bars, crackers, popsicles, muffins, etc. They are generally healthy foods but not the best choice.
Red snacks are the things I don't want them to have every day, like candy, marshmallows, cupcakes, etc. I have given them 3 red tickets for the whole week.
Maybe I should have given out fewer yellow tickets to begin with, but I am kind of hoping they learn to eat fruits and veggies instead of crackers.
on to other random topics...
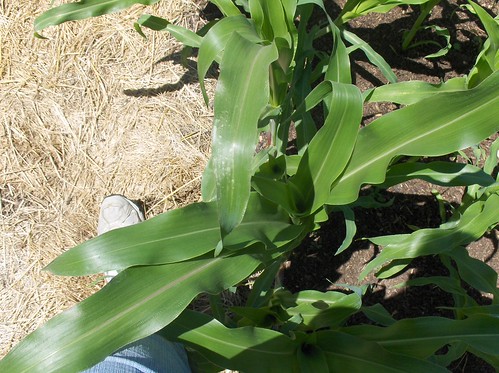
We had the hay cut, baled, and sold in a period of 4 days.
This picture was also taken on July 3 and this morning I picked the first zucchini. There will be more in a day or two. Let the grilling of vegetables begin! I can't even wait!
07 July 2007
Babywearing
Why on earth would anyone need more than one way to carry a baby around?
This is what I used to think, until I was introduced to all the fabulous ways to wear your baby. I have sewn two ring slings, a pouch, a gauze wrap, and I'm itching to do a Mei Tai.
Now I've found another one...and it will be even better if it's free! Go enter here to win a carrier made by Jenn of All Natural Mommies. Thanks to Erika for the heads up on this contest!
Subscribe to:
Posts (Atom)